
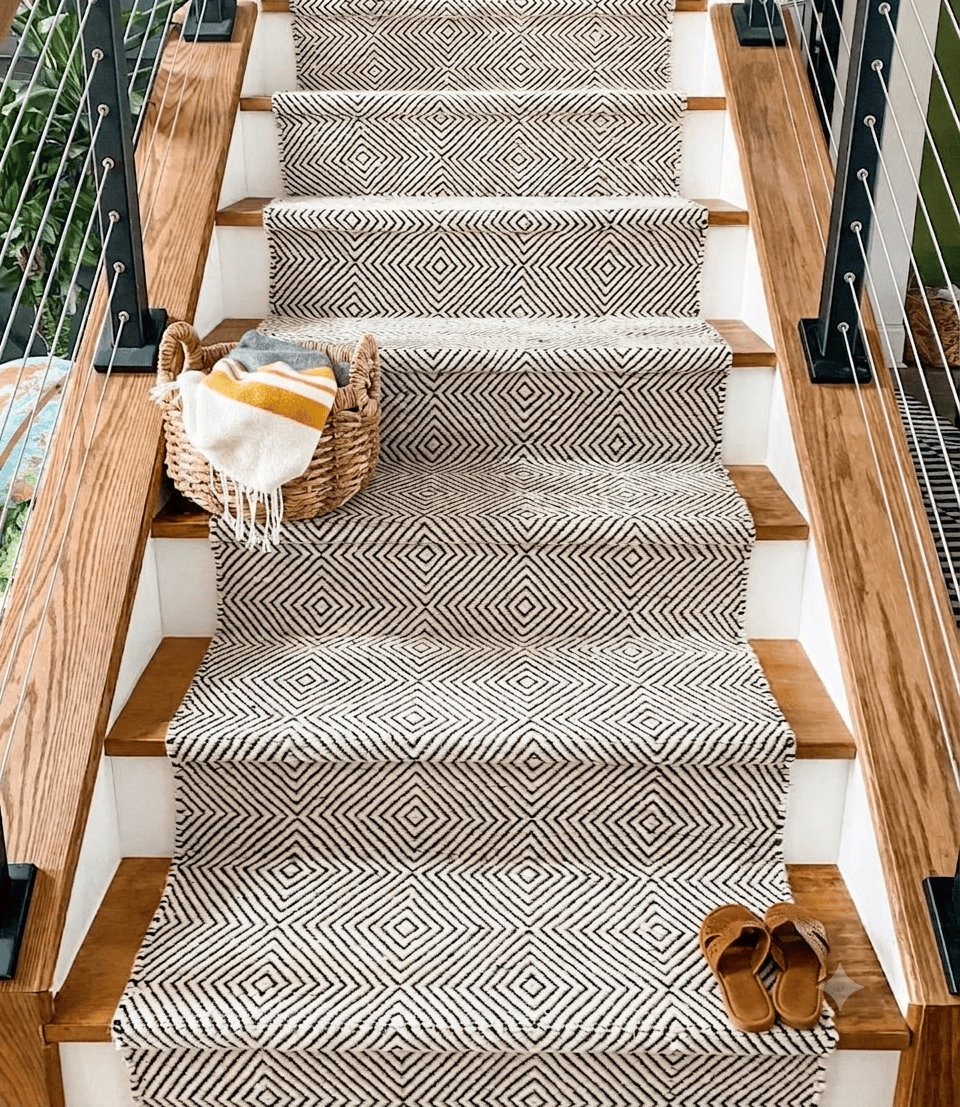
Staircases are far more than mere vertical passages connecting one story of a home to another. Positioned frequently in entryways, foyers, or central hallways, they form an immediate impression on anyone stepping through your front door. Yet, despite their prominent placement, staircases are often neglected during home renovation and interior design planning.
Introducing a stair runner—a continuous strip of carpet installed along the center of a staircase that leaves portions of the underlying hardwood, stone, or tile exposed on either side—is one of the most effective ways to bridge high-end interior aesthetics with everyday functional living. Whether you are aiming to prevent dangerous slips, dampen the thunderous sound of footsteps, or safeguard your custom woodwork from relentless wear, a well-chosen stair runner transforms a utilitarian structure into an architecturally striking focal point.
In this comprehensive, expert-level guide, we dive deep into every aspect of stair runners: from evaluating fiber durability and deciphering complex sizing formulas to executing a flawless DIY installation and maintaining your investment for decades to come.
1. Why Install a Stair Runner? Unpacking the Key Benefits
If you have ever hesitated about covering up polished hardwood stairs, it helps to analyze why top interior designers and homeowners consistently prioritize stair runners. Combining architectural framing with textural warmth, runners offer distinct advantages that go far beyond superficial beauty.
A. Enhanced Safety and Slip Resistance
Bare wooden, laminate, or polished stone treads can be surprisingly slippery, especially when wearing socks, smooth-soled shoes, or navigating the stairs in low light. For households with young children, elderly family members, or energetic pets, an uncarpeted stair poses a genuine safety hazard. A high-density stair runner introduces crucial traction underfoot, significantly mitigating the risk of slips and tumbles.
B. Acoustic Dampening and Noise Control
Staircases act as natural sound amplifiers. Uncovered wooden steps echo footsteps, creaks, pet paws, and dropped items across entire floors. The cushioned pile and underlayment of a stair runner absorb impact vibration and airborne sound waves, instantly transforming a noisy, clattering staircase into a quiet, peaceful transition zone.
C. Hardwood Protection and Wear Mitigation
The center of stair treads experiences some of the heaviest foot traffic in any residence. Over time, grit, shoe heels, and daily friction wear down polyurethane finishes, scratch staining, and cause irreversible timber indentation. Replacing or refinishing damaged treads is an expensive and disruptive process. A runner acts as a durable shield, absorbing daily friction while preserving the pristine wood beneath.
D. Architectural Elevation and Visual Framing
From a design standpoint, a runner creates an enticing visual line that draws the eye upward, highlighting the architecture of your balustrades and risers. By leaving several inches of wood exposed on both sides, a runner frames your staircase, offering a sophisticated contrast between rich wood grains and soft woven textures.
2. Choosing the Best Material and Texture for Your Space
Stair runners must endure localized, repetitive pressure that flat room rugs rarely experience. Selecting the right fiber type and pile construction is the critical first step toward ensuring long-term performance and ease of maintenance.
Key Material Options
1. 100% Wool Fibers
Durability: Exceptional
Texture: Soft, resilient, luxurious
Stain Resistance: Naturally moisture-resistant due to inherent lanolin oils
Best For: Primary staircases, traditional or luxury interiors, high-traffic homes
Overview: Wool is universally regarded as the gold standard for staircase applications. Its natural crimp gives it remarkable fiber memory, allowing it to spring back after heavy compression rather than crushing flat over time. While wool requires a higher upfront investment, its longevity and inherent flame-retardant qualities make it extremely cost-effective in the long run.
2. Synthetic Fibers (Nylon and Polyester)
Durability: High to Very High (Nylon leads in resilience)
Texture: Smooth, versatile, comfortable
Stain Resistance: Outstanding
Best For: Families with young children, pet owners, budget-conscious renovations
Overview: Premium synthetics—particularly solution-dyed nylon—offer impressive resistance to staining, fading, and abrasion. Synthetic runners are non-porous, making cleanups simple when liquid spills or muddy paws inevitably strike. They are available in an endless variety of vibrant patterns and modern colorways at a fraction of the cost of wool.
3. Natural Plant Fibers (Jute, Sisal, and Seagrass)
Durability: High (Abrasive resistance)
Texture: Firm, coarse, organic
Stain Resistance: Low to Moderate (Highly sensitive to moisture)
Best For: Coastal, rustic, Scandinavian, or Bohemian design aesthetics
Overview: Plant-based runners bring an unmatched organic texture and understated earthy tones to a home. Sisal is exceptionally tough and durable. However, natural plant fibers are prone to water staining and can feel harsh under bare feet. They are best reserved for secondary stairs or households seeking a distinct artisanal look, with the understanding that liquid spills must be avoided.
4. Flatweave vs. Cut Pile Construction
Flatweave Runners: Woven without a plush pile, flatweave carpets (such as herringbone or kilim styles) are tight, low-profile, and resistant to snagging. They bend cleanly around stair nosings without bulging, making them an top choice for crisp, tailored DIY installations.
Cut Pile (Plush/Tufted) Runners: Feature upright fibers that deliver maximum cushion and luxury underfoot. While soft, cut pile carpets require a denser construction to prevent “grinning”—a phenomenon where the backing becomes visible as the carpet bends over the curved nose of a step.
3. Style, Pattern, and Color Selection Strategies
A stair runner is an opportunity to make a bold design statement or establish a subtle, unifying motif that links different levels of your home.
A. Playing with Patterns: Stripes, Geometrics, and Florals
Vertical Stripes: A timeless favorite for staircases. Vertical lines guide the eye upward, making narrow staircases feel longer and more spacious.
Geometric & Lattice Prints: Modern geometric motifs add structure and contemporary flair. They work exceptionally well in entryways with neutral walls and minimalist décor.
Traditional Vintage & Oriental Patterns: Intricate motifs, floral borders, and distressed Persian styles are master hiders of dirt and foot marks, making them as practical as they are elegant.
B. Color Temperature and Spatial Dynamics
Dark & Saturated Tones (Navy, Charcoal, Forest Green): Anchors the hallway, hides everyday debris, and creates a dramatic contrast against white painted risers or light oak treads.
Light Neutrals (Warm Beige, Cream, Soft Gray): Brightens dark stairwells and creates an open, airy feeling. Ensure you select a fiber with built-in stain protection if choosing lighter hues.
C. Edge Binding Options
The edges of a stair runner must be properly finished to prevent fraying and complete the look:
Cotton Canvas Binding: A fabric border (typically 1 to 2 inches wide) sewn along the sides. Choosing a contrasting binding color creates a sharp, tailored frame.
Serging: A continuous thread wrapped tightly around the carpet edge for a clean, minimalist border that blends seamlessly with the pile.
4. How to Measure Your Staircase with Precision
Accurate measurement is the cornerstone of a successful installation. Ordering too little carpet leaves you with an unfinished project, while ordering excessive yardage leads to unnecessary expense.
Phase 1: Determining the Runner Width
A stair runner should never cover the entire width of the tread; exposed timber on both sides provides essential visual balance.
Standard Rule of Thumb: Leave between 2 to 4 inches of exposed wood on each side of the runner.
Standard Stair Width (36 Inches): A 27-inch wide runner is the classic industry standard, leaving 4.5 inches of revealed tread on each side.
Wider Staircases (42+ Inches): Opt for a 30-inch or 32-inch runner to maintain balanced proportions.
Phase 2: Calculating Total Runner Length
To calculate length accurately, prepare a flexible tape measure and break down a single step into three component parts:
Tread Depth: Measure horizontally from the back corner (where the tread meets the riser) to the front edge of the step.
Nosing: Measure around the curved front lip or overhang of the step.
Riser Height: Measure vertically from the top of one tread to the bottom of the next.
The Single-Step Formula:
Single Step Requirement = Tread Depth + Nosing Circumference + Riser Height + 1 Inch (Safety/Tucking Allowance)
The Total Length Formula:
Total Runner Length = (Single Step Requirement × Total Number of Straight Steps) + Length of Landings + 10% Waste/Trimming Margin
Example Calculation:
Tread Depth: 10.5 inches
Nosing: 1.5 inches
Riser Height: 7.5 inches
Extra Allowance: 1.0 inch
Total per step: 20.5 inches (1.71 feet)
For a standard 13-step flight: 1.71 feet × 13 steps = 22.2 feet. Adding a 10% safety margin (2.2 feet) brings your total required length to 24.4 feet.
5. Step-by-Step DIY Installation Masterclass
With basic tools, careful planning, and patience, installing a stair runner is a rewarding DIY project that can be completed in a single weekend.
Essential Tool Checklist
High-density carpet padding (rug pad)
Pneumatic or heavy-duty electric staple gun (with 3/8-inch or 1/2-inch crown staples)
Carpet bolster (or wide putty knife for tight crevice tucking)
Utility knife with fresh, sharp blades
Heavy-duty carpet shears or scissors
Measuring tape, chalk line, and carpenter’s level
Method Comparison: Waterfall vs. Cap-and-Band
Before installing, choose your preferred aesthetic technique:
Waterfall Method: The carpet falls straight down from the edge of the nosing directly to the back of the next tread. It creates a clean, relaxed drape and is easier for DIY installation.
Cap-and-Band (Fitted) Method: The carpet is pulled tight underneath the curvature of the nosing and fastened flush against the riser before dropping down. This produces a traditional, crisp, tailor-made profile.
Step-by-Step Installation Process
Step 1: Preparation and Inspection
Begin by thoroughly cleaning the staircase. Remove any lingering dirt, old tack strips, or protruding nails. Repair loose treads and ensure painted risers are completely dry and cured.
Step 2: Cut and Secure the Rug Pads
Never skip the carpet pad. It adds vital cushioning, reduces fiber friction, and extends the lifespan of your runner.
Cut individual pad pieces for each step. The pad width should be 1 inch narrower than the runner (0.5 inches inset on each side).
Position the pad on the tread, wrapping it slightly over the nosing.
Secure the pad using a staple gun every 3 to 4 inches along the back corner and under the nosing. Do not place padding on the vertical risers.
Step 3: Establish a Center Reference Line
Precision alignment prevents the runner from drifting crookedly as you move up the stairs.
Measure the center of your top and bottom steps and mark them with chalk or painter’s tape.
Use a chalk line or laser level to project a straight guide along the entire staircase.
Step 4: Anchor the Starting Base
Begin at the bottom of the staircase. Align the bottom edge of the runner flush against the floor or the base of the lowest riser.
Use a level to confirm the carpet is square.
Using your staple gun, drive staples every 2 inches into the crevice where the bottom riser meets the floor or trim. Hide staples deep within the carpet pile or along the binding edge.
Step 5: Progress Upward (Tuck and Staple)
Pull the runner taut over the first step pad.
Use your carpet bolster to push the carpet firmly into the 90-degree angle where the tread meets the riser.
Drive staples horizontally into the seam where the tread and riser join, placing them close together to ensure a snug fit.
For the Cap-and-Band method, wrap the carpet tightly under the nosing and staple upward into the underside of the wood projection before smoothing down the riser.
Repeat this sequence step by step, continually checking your alignment against your chalk guide line.
Step 6: Finishing the Top Boundary
Once you reach the top riser, pull the carpet tight against the top threshold or underneath the top nosing.
Drive a final row of hidden staples.
Using a fresh utility knife, carefully trim away excess carpet.
Fold any remaining raw edge underneath itself to create a clean, finished seam, securing it with final anchor staples.
6. Long-Term Maintenance and Care Protocols
To ensure your stair runner remains vibrant, resilient, and clean through years of daily foot traffic, implement a consistent maintenance routine.
A. Routine Vacuuming
Frequency: Vacuum 1 to 2 times weekly.
Technique: Use a lightweight canister vacuum or a handheld vacuum fitted with a soft brush attachment. Avoid heavy motorized beater bars on stair edges, as aggressive rotating brushes can fray bound edges or pull tufts.
B. Immediate Spot Cleaning
Spill Protocol: Act quickly when liquids hit the runner. Blot immediately using a clean, dry white cotton cloth or paper towel. Never rub or scrub vigorously, as friction forces liquid deeper into the carpet backing and distorts the pile fibers.
Cleaning Solutions: Apply a mild, pH-neutral carpet cleaner or a solution of warm water mixed with a drop of gentle dish soap. Test any cleaning agent on a small, hidden area of the runner first.
C. Periodic Professional Deep Cleaning
Schedule a professional steam cleaning or hot-water extraction every 12 to 18 months. Professional cleaning removes deeply embedded grit that acts like sandpaper against carpet fibers, preserving the structural integrity and texture of your runner.
Final Thoughts
A stair runner is one of the most rewarding home improvement investments you can make. By carefully evaluating your household’s lifestyle requirements, choosing durable materials like wool or high-grade synthetics, applying precise sizing formulas, and following proper installation techniques, you can transform your staircase into a quiet, safe, and visually captivating masterpiece that elevates your entire home.
About author

Add comment